Showing posts with label decorating. Show all posts

little boys room switch and makeover

When we moved in in 2020, we set up the bedrooms with furniture we already had and decided we'd wait until we were ready to switch rooms to decorate them. After several years of sharing a room, Camden and Savannah are now going their separate ways (down the hall) and Jonas and Levi get a turn at being roommates in the bigger room. 

The process to makeover the little boys new room was a little involved since the big kids had to move out and relocate to the loft for a week while we re-did the room.


Before photos (warning, it is a huge mess)

I'm really hoping Cam & Savy will keep their new rooms cleaner since they'll be taking more ownership for the space. These were taken on a particularly bad day.


Process:

1. We moved furniture out (which meant moving furniture in other rooms around, too, which was quite the process) and cleaned the baseboards/windows and patched holes.

2. My mom was willing to paint most of the walls (thank you!) and she is more detailed and patient than I am on these things. I painted the accent wall with a geometric design I threw together. I used Sherwin William's free color consultation to pick the color combination.

3. Due to space limitations, we weren't able to use the second bed from the bunk set (and didn't want the beds bunked for safety) so we got a toddler bed for Levi and put it together. I set up the storage cube shelf (we already had), the activity table, the and the Nugget (we just got for Christmas). I got cool, zippable bedding called Beddy's from an outlet store.

4. Chris installed wood shelves that I he cut and I stained. We made the "desk" shelf with special brackets that fold it flat against the wall in case a certain little climber decides he can't stay off of it. I installed the curtains.

5. The most fun part was bringing in the various decorations. Many of the cars and trucks we already had. I had purchase a few wall decor items from Hobby Lobby and digital prints from Etsy which I printed at Walgreens.

After:


sewing

Chris got me a sewing machine for Christmas. Then, my mother-in-law gave me a quick tutorial and walked me through making a pillow using a pattern.  Since then, I've made several little projects.  You can call me Martha Stewart now.  Ok, maybe not.  I find I'm not very good at taking my time and being detailed when it comes to sewing (maybe because I don't have much time at night to sew) and I've only done fairly easy projects and they certainly did not come out perfectly.  I do enjoy it and am constantly thinking of new things to create! I linked to some tutorials in case you want to make some of these, too!

First, I made this valance for Camden's new room (his room is still in-the-works):


Then, with left over fabric I made covers for 2 random pillows I had (also for Camden's room):

Although these no-sew tie covers worked fine in our front room, I needed something sturdier for our living room pillows, so I just made envelope covers for them also:


I took a pot holders and turned them into flat iron and curling iron covers (seriously, this took 5 minutes):


I made Camden a pillow for his car seat so he doesn't get a crink in his neck when he is car seat napping.  He doesn't want to use it, but I think it will work better in a forward-facing car seat:


This rice pack warmer was easy , but I haven't bought corn to stuff in it (I guess corn works better than rice?)

I've got a few other ideas in queue (our mudroom project has taken all of my "home improvement/sewing" budget for now) including this pillow mattress.  Let me know if you have any ideas or tips!


Before & After: File Cabinet

We have this big file cabinet that we use all the time...but it is ugly!  I bet you might have one of these, too. With the help of Pinterest, I decided to give it a face lift! I guess I even used the same pattern (not on purpose...I must have just liked how it looked). The total cost is around $30 (2 cans of spray paint primer, 4 cans of spray paint, 1 pack of vinyl wall decals).


If you wish to do this project, here are my notes I'd add to the project instructions:
- it did only take 2 cans of primer, but I ended up using 4 (3 plus a little of #4) cans of paint.  My primer was dark gray and my top coat was lighter, so that may have been the reason why.  You should buy extra paint so you aren't stuck with a half finished project until you get more paint.
- I just followed the instructions on the can regarding how long to wait between coats.  You may be able to finish the whole painting project within an hour or two instead of waiting all day in between the primer and top coat.
-the vinyl stripes are also available on Amazon.com and are 16' (the same ones on the Target website were 12' long).  I wanted to have some extra in case I should ever need to replace one of the sections.  They also sell matching/coordinating circles and squares if you want to use them else where in your room to decorate


Before:


After:


Nursery - art projects

Our nursery is pretty much complete minus some linens and things that are on our registry and I love it! Here are some of the projects:

I knew I wanted some Eric Carle animal art in the room to go with the "jungle" theme.  I love the colors!  Chris and I scoured the book store until he stumbled upon this book that had the right size and style of pictures I wanted.  I cut out a few and framed them to put above the changing table and on another wall in the room.  Talk about easy and cheap art!


I also knew I wanted some star lanterns to add some color and light.  They have bulbs inside to light them up.  I had Chris' dad cut a piece of wood to fit in the corner of the room so the cords would be mostly hidden.  Chris painted the wood to match the walls.  They are very colorful and provide dim light at night.


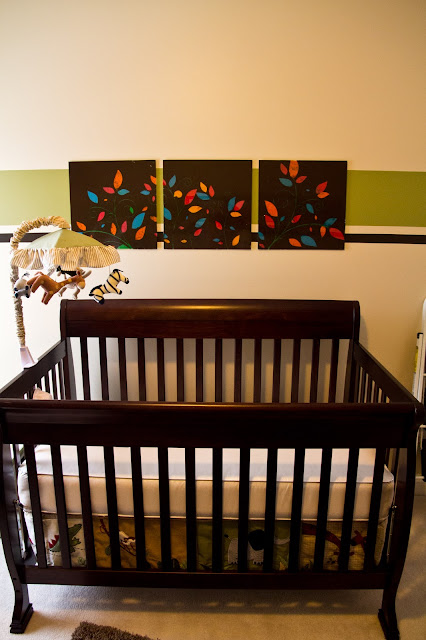
I bought 2 vinyl wall decals on Etsy.  They have about a million options, but I didn't want anything too giant, elaborate, or expensive.  I got a three-panel vine decal and stuck it to plexiglass squares of the same size (NOT easy).  I could have left them that way, but glued some tissue paper behind the glass to add some color.  I could always wash it off and just let the background be visible.


The second wall decal was of these stacked animals.  I loved this from the first time I saw it!