Showing posts with label DIY. Show all posts

little boys room switch and makeover

When we moved in in 2020, we set up the bedrooms with furniture we already had and decided we'd wait until we were ready to switch rooms to decorate them. After several years of sharing a room, Camden and Savannah are now going their separate ways (down the hall) and Jonas and Levi get a turn at being roommates in the bigger room. 

The process to makeover the little boys new room was a little involved since the big kids had to move out and relocate to the loft for a week while we re-did the room.


Before photos (warning, it is a huge mess)

I'm really hoping Cam & Savy will keep their new rooms cleaner since they'll be taking more ownership for the space. These were taken on a particularly bad day.


Process:

1. We moved furniture out (which meant moving furniture in other rooms around, too, which was quite the process) and cleaned the baseboards/windows and patched holes.

2. My mom was willing to paint most of the walls (thank you!) and she is more detailed and patient than I am on these things. I painted the accent wall with a geometric design I threw together. I used Sherwin William's free color consultation to pick the color combination.

3. Due to space limitations, we weren't able to use the second bed from the bunk set (and didn't want the beds bunked for safety) so we got a toddler bed for Levi and put it together. I set up the storage cube shelf (we already had), the activity table, the and the Nugget (we just got for Christmas). I got cool, zippable bedding called Beddy's from an outlet store.

4. Chris installed wood shelves that I he cut and I stained. We made the "desk" shelf with special brackets that fold it flat against the wall in case a certain little climber decides he can't stay off of it. I installed the curtains.

5. The most fun part was bringing in the various decorations. Many of the cars and trucks we already had. I had purchase a few wall decor items from Hobby Lobby and digital prints from Etsy which I printed at Walgreens.

After:


LEGO storage

We've tried a few different solutions to help corral the legos in our house. Nothing really seemed to work and legos continued to end up in unorganized piles and I never knew where a the tiny pieces I'd find here or there should go. I eventually convinced Chris we needed to sort them by color (which meant separating out all the sets which he was resistant to, for good reason) in order for each piece to have a place.

Camden and I (but mostly me) separated out all the legos into colors while watching a movie one night. We also made bins for people/creatures/themes (pirate and castle) and a few other categories.

While we were in Cincinatti, we stopped at IKEA to buy the storage supplies. We got a tiered Trofast unit (cheaper than the two side-by-side units from the tutorial but with the same amount of storage) and several bins. We also picked this unit over the other because you can fit the smaller bins back-to-back in one slot.

At home, Camden and I used my Sillouette cutting machine to cut vinyl letters for each bin. They're removable so we could change the names of the bins whenever.

We put the unit into Camden's closet only to discover his sliding doors were blocking the far bins (oops!). Since his Lego storage now takes up the majority of the closet floor, we decided just to remove the doors for now. I got cheap curtains and a wooden dowel rod from Lowes to provide a way to hide all the closet clutter (not pictured).


Advantages: anyone can put a Lego piece where it goes, if you need a piece you know right where to look, you can more easily make creations from random instructions found online since the pieces are color coded
Disadvantages: all of the sets are now separated, so you can't just grab a set and go build it unless you collect all of the pieces first

backyard play area

My younger self always thought I'd never be that person with plastic Fisher Price toys scattered about my yard. Now, I'm the proud owner of a few of those beauties. They're fun, sturdy, and affordable...I get it.

Our outdoor project this spring is two things: starting a small vegetable garden (more on that later) and to clean up the area where the kid toys are and make it more visually appealing and functional.

Our backyard has one tree and we've placed the kids play houses and sand table under it. However, it was in no way a nice place to play. I forgot to take a "before" photo (why do I always forget?!). So just imagine a big uneven pile of dirt, mud, rocks, old bricks, and grass clippings topped with wet leaves and spiders. Gross.

Chris hired our brother-in-law, Steve, to assist him and they cleaned out the area, tilled the dirt piles flat, put down weed tarp, bordered it with paver bricks, and filled it with a rubber mulch. Now there is a nice area for the two play houses, sand table, and water table. Huge improvement!

 after it was leveled and tarped


Complete! Time to play!


blog books

Over the years, my blog has turned in to my way of cataloguing and remembering all of the little details of our daily lives. It is so easy to get caught up in the day to day that you forget to remember the small things that happen. Starting in 2012, I started turning my calendar year of blog posts into a books to act as keepsakes for the year.


In 2012 I used blog2print. It was easy to do, but I wasn't as impressed with the quality of the photos in the book but it wasn't too expensive either. It is also the biggest book.


In 2013 I used Blurb. It turned out to be the cheapest option and the photos turned out well because I customized the whole book. It did take me about 10 Downton Abbey episodes to make (Chris asks me "are you even paying attention to the show?!"), so it was very time consuming. This is my favorite book, though.

For 2014 and 2015 I used Into Real Pages. It was quick and easy and I liked the formatting that they do (each month is sectioned off). They also create a page of QR codes at the end from any links (videos/etc) from the blog. It was the most expensive option (the company is in the Netherlands), but I really didn't have time to customize everything because I made both books at the same time. I did email them and they gave me a 25% off coupon, which was nice!


 I'm so glad I have these books around our house. We don't have photo albums anymore, but this is a good alternative, I think.


Sewing Projects

Since we've had more time inside lately, I've completed a few sewing projects:

Car seat ponchos - I made Savannah a poncho for her birthday and recently made Camden a new one (his original poncho was a few years old and had several mistakes). If you decide to make one, I love the minky fleece fabric from fabric.com for the outer layer...so soft! People comment on these all the time (and I'm sure some people think it looks funny).


Book holder - Camden sleeps with about 15 books in his bed.  When he's done reading, he throws them on the floor which leads to quite a mess!  Since he still likes having his railing up (keeps the books in his bed), I made a railing book holder with pockets on either side for holding books. So far, the floors and bed are much cleaner!


Shower Curtain - I did a mini-makeover to the kids/guest bathroom.  I reused an old shower curtain and just sewed two strips of fabric along the bottom for a quick style change.

Bathtub splash pad - How does everyone handle all the water that builds up along the ledge of the tub when giving their kids baths? Originally I just used a cut up towel, but I wanted something better.  I made a fabric runner with terry cloth on the underside to help absorb at least some of the splashes.  This was actually my second attempt...I used a dark terry on the bottom of my first try and it bled dark blue dye all over... so use light colored fabric (I think that should have been obvious but now I've learned!).


 Lego Sack - I made this for the kids for Christmas to store our Duplos in.  So far it has worked great although I would probably make it bigger next time.


Main bathroom makeover

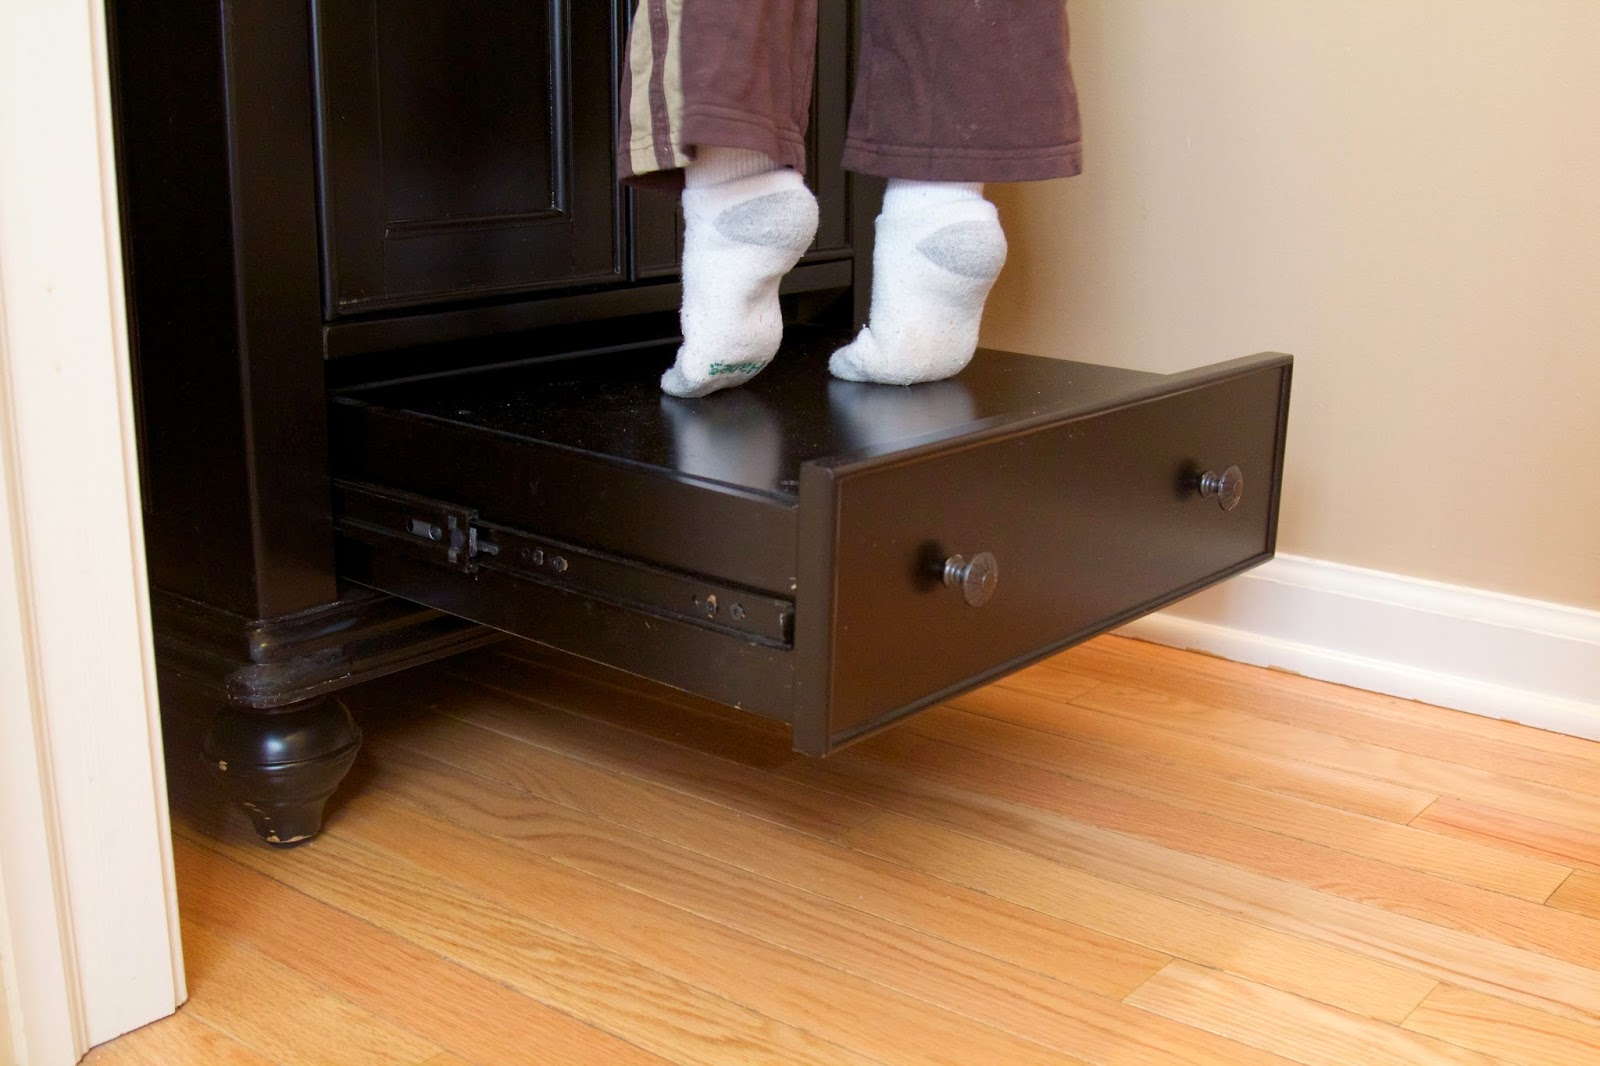
In our main floor bathroom, Camden could not reach our sink to wash his hands without dragging in a stool. Since the room is super tiny, the stool wasn't working all that well.  We decided to remove and sell the vanity (which was very nice and fancy, but not really our style anyways) and replace it with a vanity that had a bottom drawer.  We turned the drawer into a pull out step perfect for a small person to use to reach the faucet.  We also went crazy and replaced the mirror (sold the old for the same price as the new), spray painted our old fixtures, replaced the light with a $5 gold light I spray painted, and added a backsplash.  Now it is much more functional for our kids and a little more our taste :)

This is the old vanity


The new vanity: